Blog

Outdoor Homescapes Wins 2017 Best of Houzz Award

Outdoor Homescapes of Houston has won the 2017 Best of Houzz Award for customer service!
That’s three years in a row now for this prestigious award, based on the number of positive reviews on Houzz – the world’s leading platform for home remodeling and design!
 The 10-year old outdoor living and interior design firm was chosen by the more than 40 million monthly unique users that comprise the Houzz community from among more than one million active home building, remodeling and design industry professionals.
“We’re proud to have won this award three years in a row,” says Outdoor Homescapes’ owner, Wayne Franks. “When you receive an honor based on what customers think of you, the proof is really in the pudding there.”
The Best Of Houzz is awarded annually in three categories: Design, Customer Service and Photography. Customer Service honors for 2017 were based on several factors, including the number and quality of client reviews a professional received in 2016.
A “Best Of Houzz 2017” badge now appears – along with the Best of Houzz 2016 and 2015 badges – now appears on winners’ profiles, as a sign of their commitment to excellence. These badges help homeowners identify popular and top-rated home professionals in every metro area on Houzz.
“We’re so pleased to award Best of Houzz 2017 to this incredible group of talented and customer-focused professionals, including Outdoor Homescapes of Houston,” says Liza Hausman, vice president of Industry Marketing for Houzz. “Each of these businesses was singled out for recognition by our community of homeowners and design enthusiasts for helping to turn their home improvement dreams into reality.”

Outdoor Homescapes of Houston Now On Home Advisor
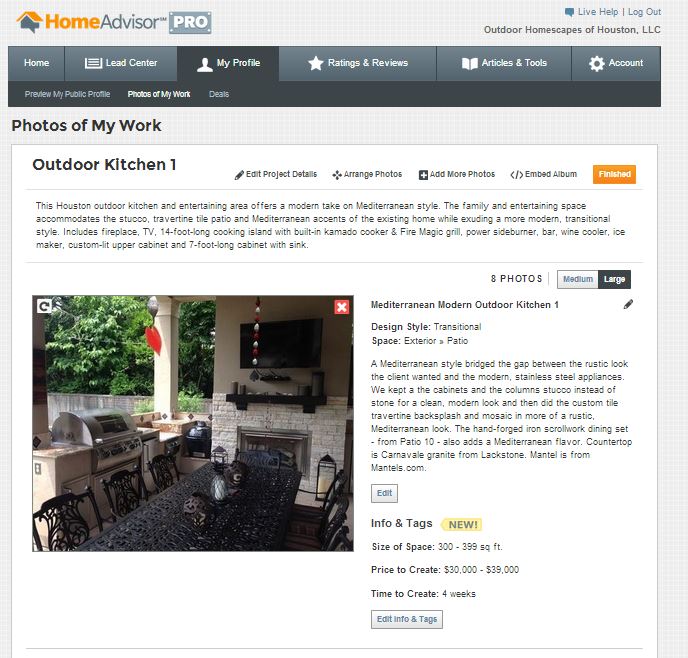
Outdoor Homescapes of Houston is pleased to announced we’re now on Home Advisor!
Being on Home Advisor means we’ve passed the home improvement help website’s stringent screening process. This involves third-party criminal and legal background checks and verifications that our business is licensed and in good standing with the local community.

“We decided to join Home Advisor because it makes finding a reputable home improvement pro in your area much easier,” explains Outdoor Homescapes’ owner, Wayne Franks. “With the site’s list of pre-screened and customer-rated local service professionals, you never have to worry about shoddy work or a contractor disappearing.”
HomeAdvisor.com also offers tools, products and resources for home improvement, maintenance and repair. To get quotes from three pre-screened pros in your area, simply type in what kind of services you’re looking for in the “Find Pros” box, then enter your zip code. Or, choose a service type category under ProFinder in the main menu.
The pros will quickly contact you with estimates, and you’ll also see the average cost for such services in your area (from their “True Cost Guide,” also available via the main menu). That way, you’ll know if each quote is on-target.
Once you’ve chosen a pro, be sure to check out their profile page for photos of their work. Check out our Home Advisor profile.
“We’ve done our homework, and Home Advisor is a trusted name in the home improvement community,” says Franks. “We’re very happy to be a part of it, and that we’re able to offer our clients one more tool to make their outdoor living project as easy as possible.”

How to Grill a Turkey for Thanksgiving (Or Any Holiday)
Grill a turkey this Thanksgiving, Christmas – or any other holiday – and you won’t be sorry!
Grilling or smoking your turkey outside will make it juicier and more flavorful than one done in a traditional oven. And Fix.com has the best info (and some great infographics) on the subject.
So here’s Fix.com’s post, “Grilling a Holiday Turkey,” re-run with their permission! Enjoy!

For many people, the holidays mean a house full of family and a small kitchen putting out a lot of food. One problem never fails to arise in this scenario. Most houses only have one oven, so it becomes problematic and stressful to bake a turkey as well as all of the side dishes, breads and pies that are also on the menu.
The easy and fun solution is to grill or smoke your turkey outside! This not only provides you with a superior, great-tasting turkey, but also frees up your oven space and stove top, and gives you a great excuse to get out of the house (far away from your Aunt Dorothy) while enjoying the crisp air with a cold beverage.
Dry Rub and Butter Injection
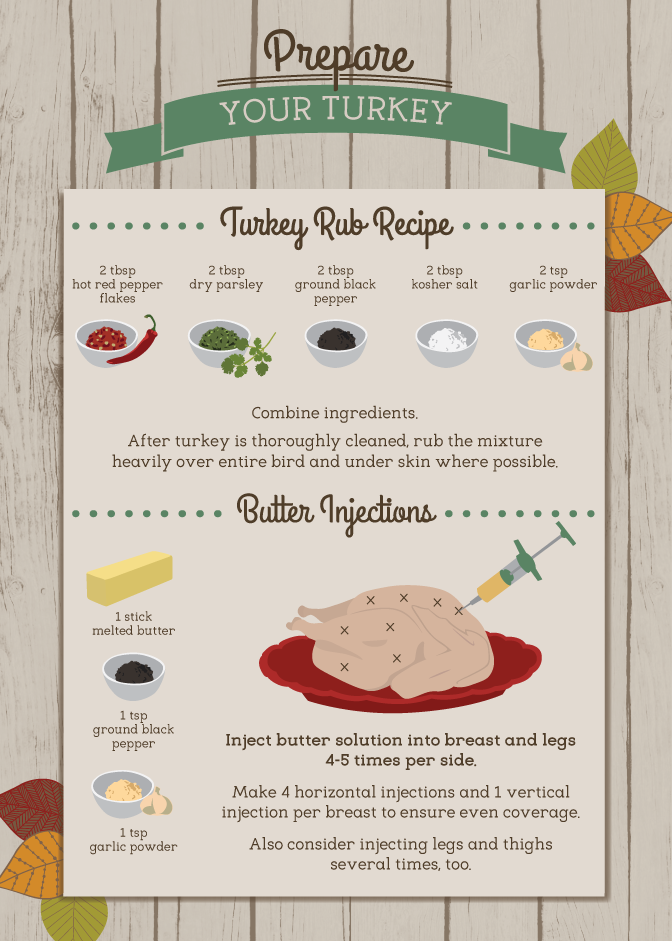
The best turkey dry rubs have a nice depth – multiple savory flavors that complement the turkey. My favorite turkey dry rub mix includes two tablespoons each of hot dried red pepper flakes, dried parsley, fresh ground black pepper, kosher salt, and two teaspoons of garlic powder. Mix the ingredients together well. After the turkey is cleaned, generously apply the rub all over the skin of the turkey and place as much underneath the skin as you can.
Let‘s face it: no matter how you cook a turkey, it has the potential to be a bit on the dry side, as compared to a big juicy beef steak, for example. The only way to ensure a completely juicy turkey is to use a butter injection. Food injection kits are available at most grocery stores and consist of big syringes with large needles, barrels and plungers.
Melt one whole stick of salted butter and mix in one teaspoon of fresh, finely ground black pepper and one teaspoon of garlic powder. Draw the butter mixture up into the injection unit. Inject the butter mixture into the thickest part of the turkey breast and slowly withdraw the needle while carefully applying pressure to the plunger. Do this at least four or five times in each breast to ensure complete coverage. You can also repeat the process in the thickest area of each leg and thigh.
Charcoal Grilling
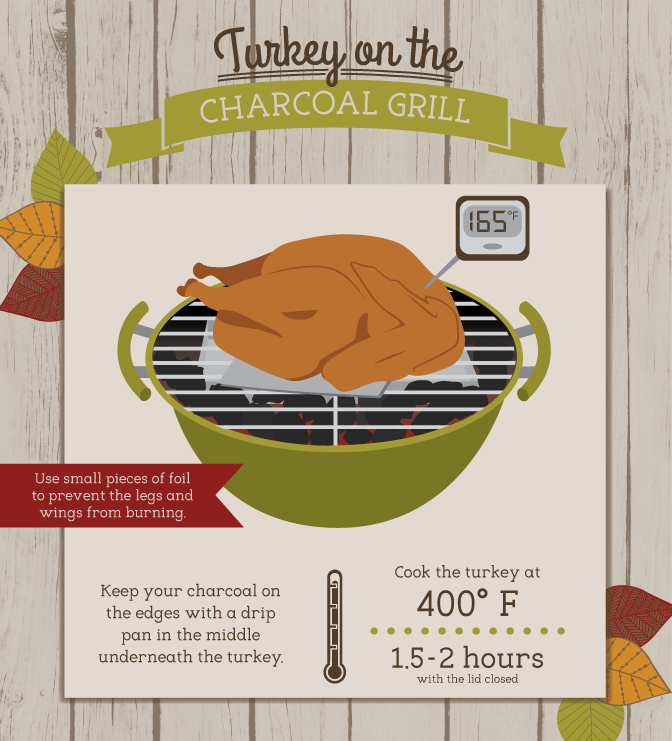
Many of us have a simple, black, kettle-style charcoal grill. Luckily, this type of grill works perfectly, even for a big 20-pound turkey. Turkeys are large birds and must be cooked over indirect heat. This means the heat source should be away from the turkey and not directly under it. The easiest way to arrange this with a charcoal grill is to place charcoal on the left and right side of the kettle, but not the center. Underneath the cooking grate, in the center of the grill, place a large aluminum drip pan to catch the turkey drippings and to provide an area under the bird from which no direct heat will emanate. Place enough charcoal on each side to get the barbecue to around 400 degrees F. Position the turkey directly on the grilling grate above the drip pan and close the dome. If you have a really large wide bird place a sheet of aluminum foil underneath each of the turkey legs, as they will probably hang over the direct charcoal heat and burn a little. The foil will protect the turkey legs and wings from burning by refracting some of the heat. A turkey will take about one-and-a-half to two hours at this temperature, and by the end of the cook the grill should have only dropped to about 350 degrees F. If the grill temperature drops too quickly, add some additional charcoal during the cook to keep the heat going. The turkey will be finished when the internal temperature is 165 degrees F. This applies to all cooking methods listed below as well.
Gas Grilling
A three-burner gas grill works the best for grilling a turkey because the left and right burners can be used to provide heat, while the middle burner remains turned off. Most gas grills do not have enough room under the grilling grate to position an aluminum drip pan, so simply sit the turkey inside of the aluminum tin above the middle, inactive burner. Adjust the left- and right-side burners so the grill reaches a temperature of 350–400 degrees F. If the turkey legs are hanging out of the aluminum tin, add a small piece of foil to protect the legs from the heat, as with the charcoal method. A turkey will take about one-and-a-half to two hours at this temperature range.

Smoking a Turkey
Smoking a turkey is an amazing experience. A turkey will take much longer to cook on a low-heat smoker, but the resulting pink smoke ring and corresponding mild taste of smokiness is priceless. There are many types of smokers with different cooking arrangements. Most smokers will allow for an indirect cooking process. Set up the smoker for a typical low-and-slow barbecue temperature of approximately 250 degrees F. Select a light smoke wood such as apple or cherry and place the wood chunks throughout the charcoal so an even mild smoke is distributed throughout the cook. On a multi-grate smoker, sit the turkey on the top grate and position an aluminum drip pan underneath it, on a bottom grate. Depending on your specific temperature for the cook, the turkey will take approximately 30–40 minutes per pound.

Rotisserie Turkey
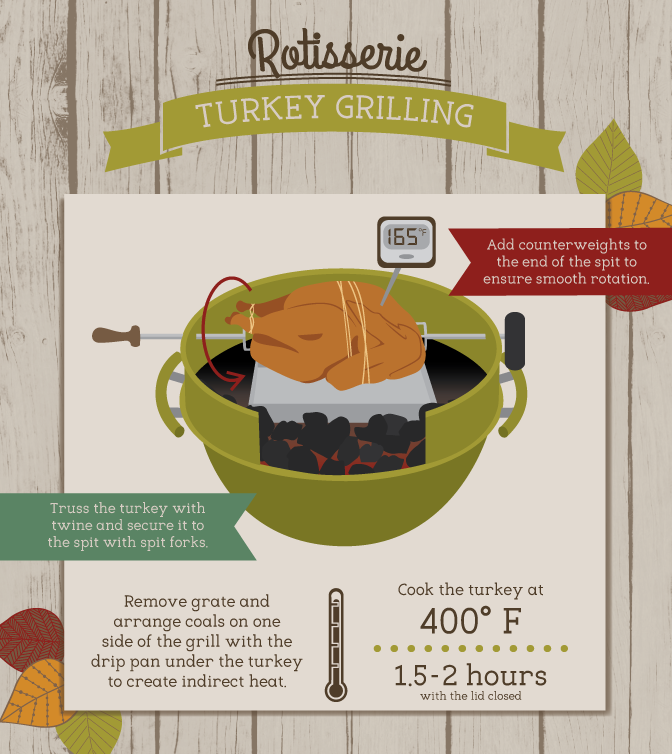
A very nice, reasonably priced, rotisserie attachment is available for the typical charcoal kettle grill. The attachment is strong enough to handle a large turkey. The rotisserie provides a unique way to keep a turkey extra moist and flavorful by allowing the juices to rotate or roll around the turkey while it spins on the rotisserie spit. It is helpful to truss the turkey with cotton butcher’s twine when using a rotisserie. Start with a long piece of twine about four to five feet long. At the center point of the twine, wrap it around the bottom of each drumstick twice, and pull tightly to bring the drumsticks into direct contact with each other. Flip the turkey over and wrap the twine around each wing, then flip the bird back over to tie the twine on top of the turkey breast. Different methods of trussing a turkey are acceptable; the goal is simply to keep the legs and wings from flopping around as the turkey rotates. Arrange charcoal on one side of the grill to achieve a heat of approximately 400 degrees F. Remove the grill grate and place an aluminum pan underneath the spot where the turkey will be rotating. Add the turkey securely to the rotisserie spit, then install the spit on the rotisserie attachment. Do not replace the grill grate, as you might need the extra room for the turkey to rotate without bumping into the grate. Counterweights can be attached to the end of the spit to keep smooth rotation. A turkey will take about one-and-a-half to two hours at this temperature and by the end of the cook the grill should have only dropped to about 350 degrees. If the grill temperature drops too quickly, add some additional charcoal during the cook to keep the heat going.
Grilling Gravy
No matter which turkey-grilling method you choose, be sure to save the drippings in the aluminum tin and use them to make gravy on the grill. Not only will this impress your family, it also provides a fantastic, unique grilled flavor while still keeping the stovetop free for other dishes. Once the turkey is done, remove the bird from the grill or smoker and cover it in aluminum foil to rest for about 20 minutes. Remove the aluminum tin, being careful not to spill any of the precious drippings. Add a few extra coals to the grill and rearrange them to the center. If you used a smoker, it’s best to light your regular grill for this step. In a small bowl, combine about half a cup of all-purpose flour with half a cup of hot water and mix well. Drain the drippings from the aluminum pan into a saucepan and place the pan over direct heat on the grill grate. Slowly add in a few tablespoons at a time of the flour mix and stir until the gravy starts to simmer and the desired thickness is achieved. You don‘t have to use all of the flour mix; it will depend on the thickness and fat content of the collected drippings. Taste the gravy and add a little salt if needed. Once the gravy is as thick as you like it, remove the saucepan from the grill and place the gravy in a serving dish. When the turkey dry rub mentioned above is used, no additional spice is needed other than a little salt, depending on your preference. The gravy is spicy and richly flavored from the parsley, hot pepper, black pepper, and turkey drippings.
Grilling or smoking a turkey is a fun way to create a unique holiday experience for your family and friends. Hanging out by the grill for a few hours while there is a packed house and a steamy kitchen has many advantages. Most importantly, however, the flavors rendered by a grill or smoker cannot be replicated by an indoor oven and will have your friends and family begging you to cook your grilled, butter-injected, holiday turkey for them every year.
Houston Outdoor Kitchen Goes Mid-Century Modern
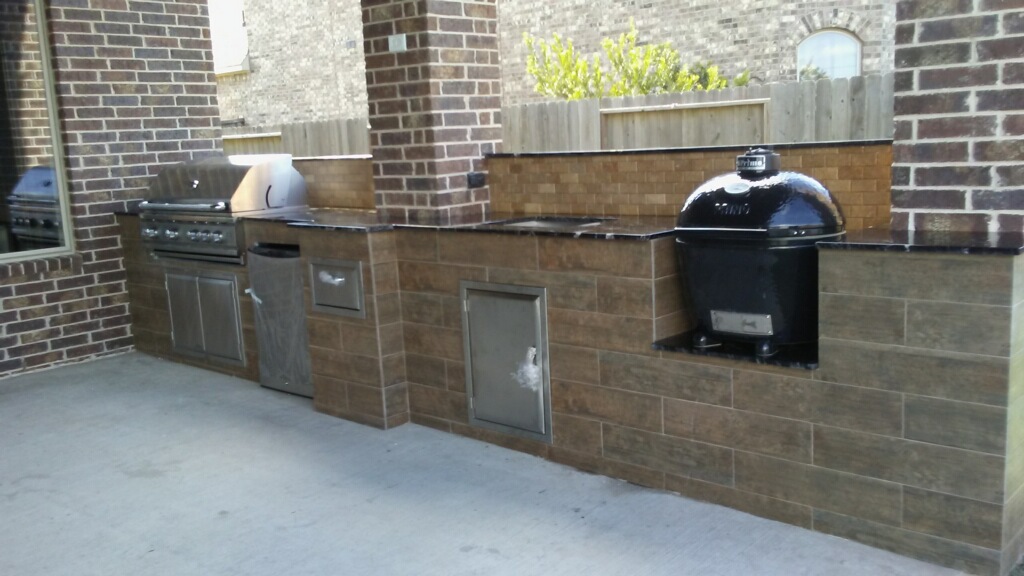
This Houston outdoor kitchen reflects a big style change occurring indoors and out.
“There’s a movement toward a cleaner, Mid-Century Modern look,” says Outdoor Homescapes of Houston owner Wayne Franks. “Outdoors, this means a transition away from the rustic look that has dominated outdoor living spaces for several years now.”
For instance, the 18-foot-long outdoor kitchen is faced with 6 x 24-inch smooth, porcelain tiles (“Country Sunset”) instead of natural stone with rugged or split-face textures. And instead of different shapes, sizes – or even colors – of stone, these tiles are arranged in a simple brick pattern.
The outside wall of the outdoor kitchen features the same tiles:
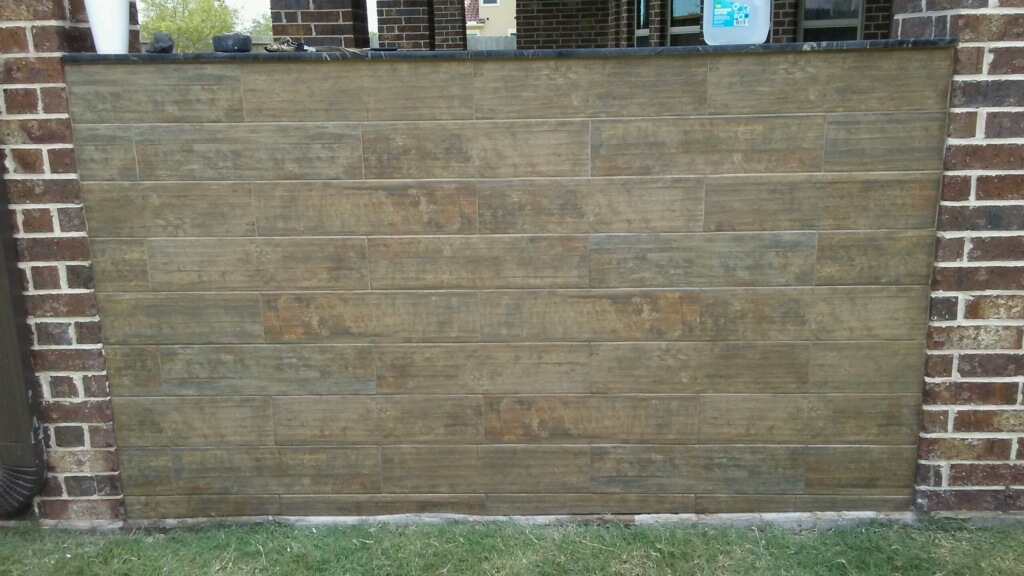
“The variation of colors within each tile still keeps it natural looking,” says Wayne. “The same goes for the Noce travertine backsplash, which is also done in a 3D basketweave pattern to keep it clean, yet visually interesting.”
The outdoor kitchen island also houses a built-in, Primo kamado-style cooker and the following stainless steel, RCS accessories: a 38-Cutlass Pro grill, a fridge, a sink and a cabinet with a built-in paper towel holder.
The countertop is Titanium granite.
The floor, meanwhile, is concrete – also popular with the clean, modern look.
The client – a young, professional couple with two kids – also added something unique to the mix – a hot water tank.
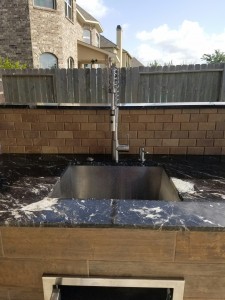

“Usually, the water from an outdoor kitchen faucet is cold,” explains Wayne. “People usually don’t want to deal with running extra gas lines out for the hot water heater.”
The client also added a garbage disposal.
“I think we’re going to see a lot more of this cleaner, modern look,” says Wayne. “People aren’t necessarily making every element ‘Mid-Mod,’ but they’re definitely incorporating a lot of its streamlined elements.”
Houston Remodel is Perfection, Inside And Out
In this beautiful Houston remodel, we gave the exterior AND interior a complete makeover – with a new outdoor kitchen, patio cover and balcony outside and a Mid-Century Modern redesign on the inside:
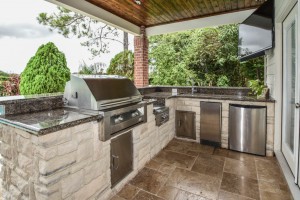

“This project was really unique, not only in the extensive scope of it, but in the number of different elements needing to be coordinated with each other,” says Outdoor Homescapes of Houston owner Wayne Franks. “And our entire team really rose to the challenge.”
Here’s a roundup of photos and details.
Like what you see and want your own upgrades? All you have to do is contact us!
Exterior work
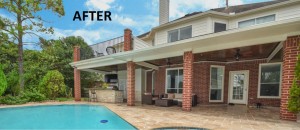
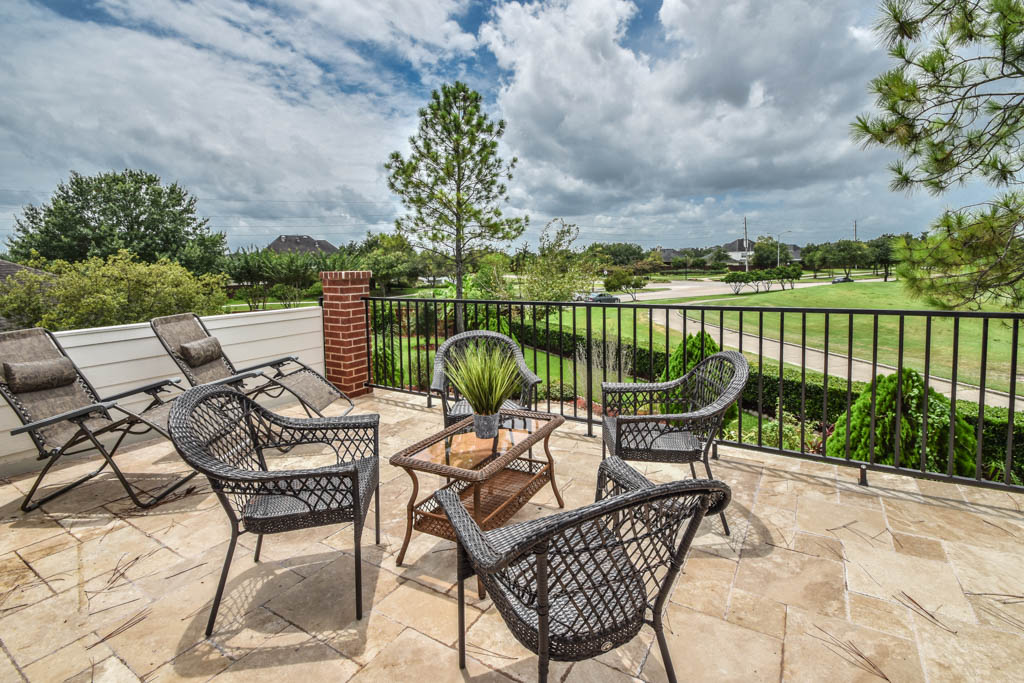
The new outdoor living space for the client – a Houston couple and their two teenage sons – includes a 14 x 20-foot patio addition with an outdoor kitchen and balcony.
Here’s a before-and-after shot of the entire exterior:

And here’s a close-up of the finished balcony:
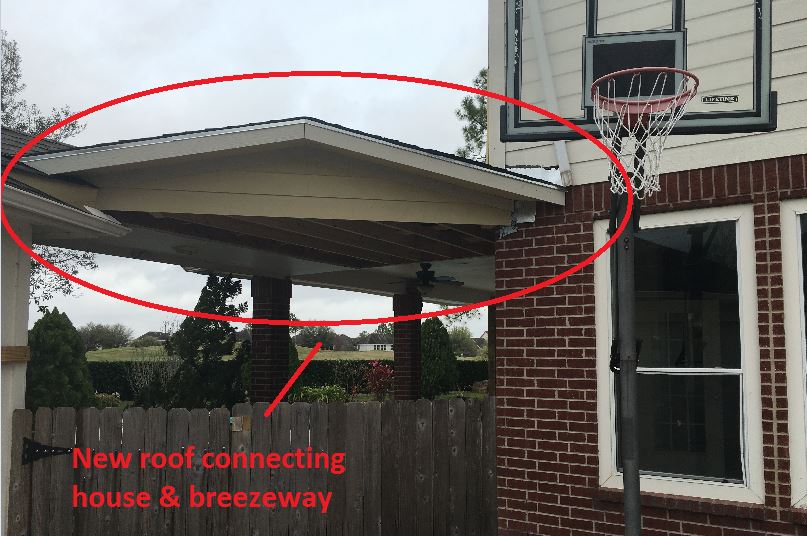
We also extended the roof over the patio between the house and the breezeway (the new section is 26 x 14 feet):
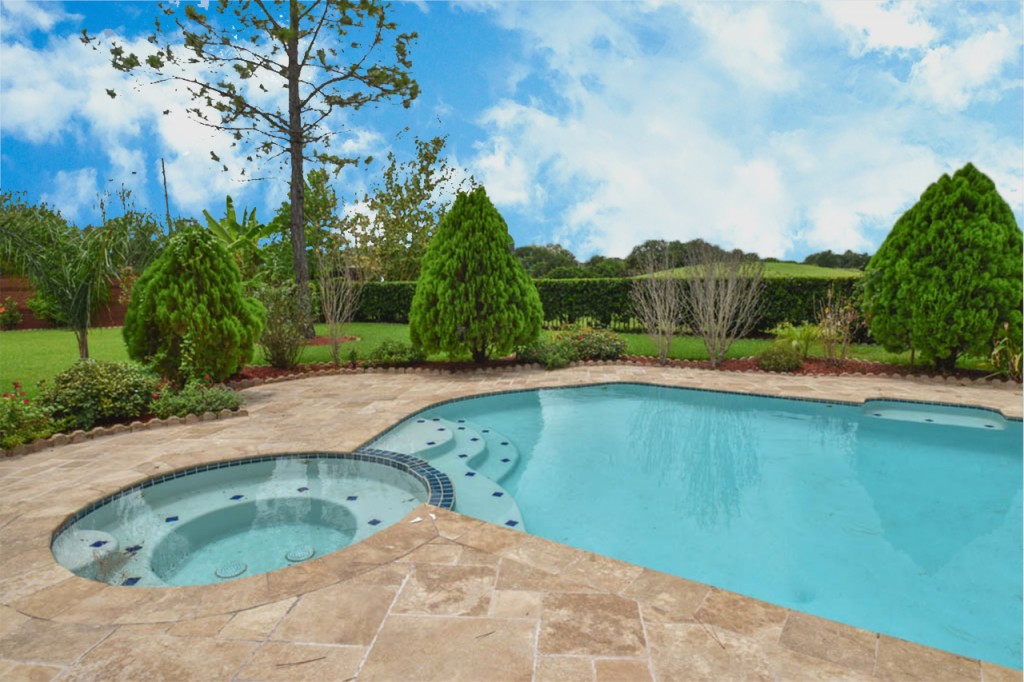
On the patio and balcony, we laid about 1,100-square foot of new hardscaping in the place of pea gravel. The new material is a gorgeous, honed-and-filled Nysa travertine tile in a Versailles pattern. We used the same tile for the new pool coping, too.
Here’s a close-up of the tile around the pool:
We also added French doors leading to the patio and balcony from a lower bedroom and upper game room, respectively:
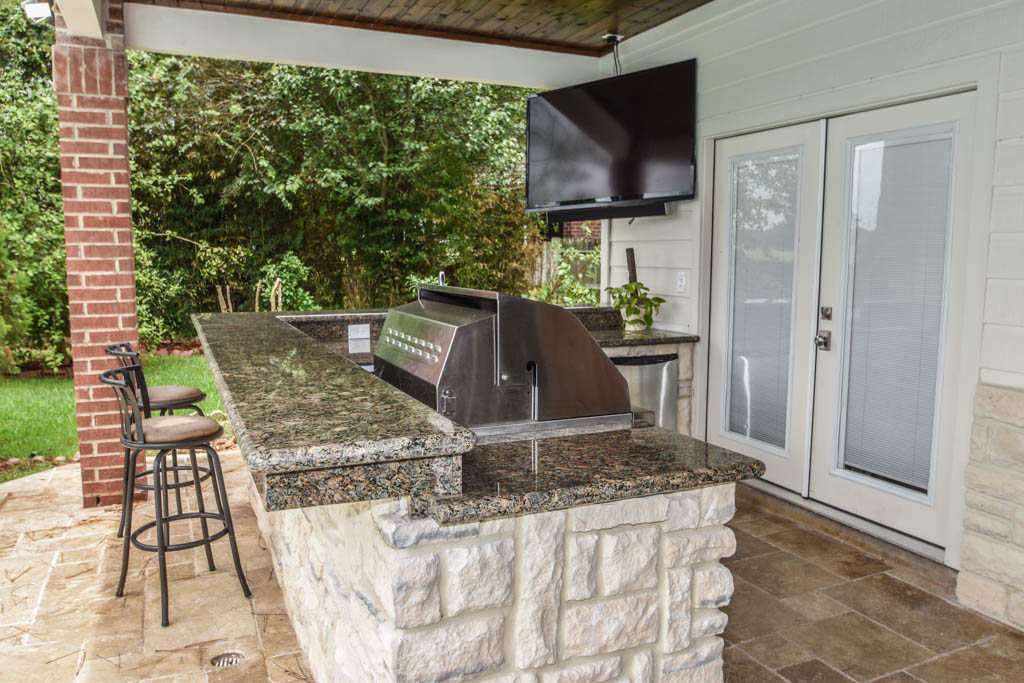
Also shown in the photo above: Southern Cream cobblestone on the outdoor kitchen island and Titanium granite for the countertop and raised bar.
The 8 x 12-foot, L-shaped kitchen island houses all RCS stainless steel appliances: a 27-inch grill, ice maker, lowered power burner, fridge and sink.
The new outdoor ceiling is tongue-and-groove pine boards in the Minwax stain “Jacobean.”
“We always start with the biggest element in the space and work around that,” explains Lisha Maxey, senior designer at Outdoor Homescapes and owner of LGH Interiors in Houston. “In this case, it was definitely the travertine tile that we coordinated around.”
Interior redo
Inside, we repainted the entire house from top to bottom, including baseboards, doors, crown moulding and cabinets. We also updated the lighting throughout (click on any image in the gallery to make it bigger):
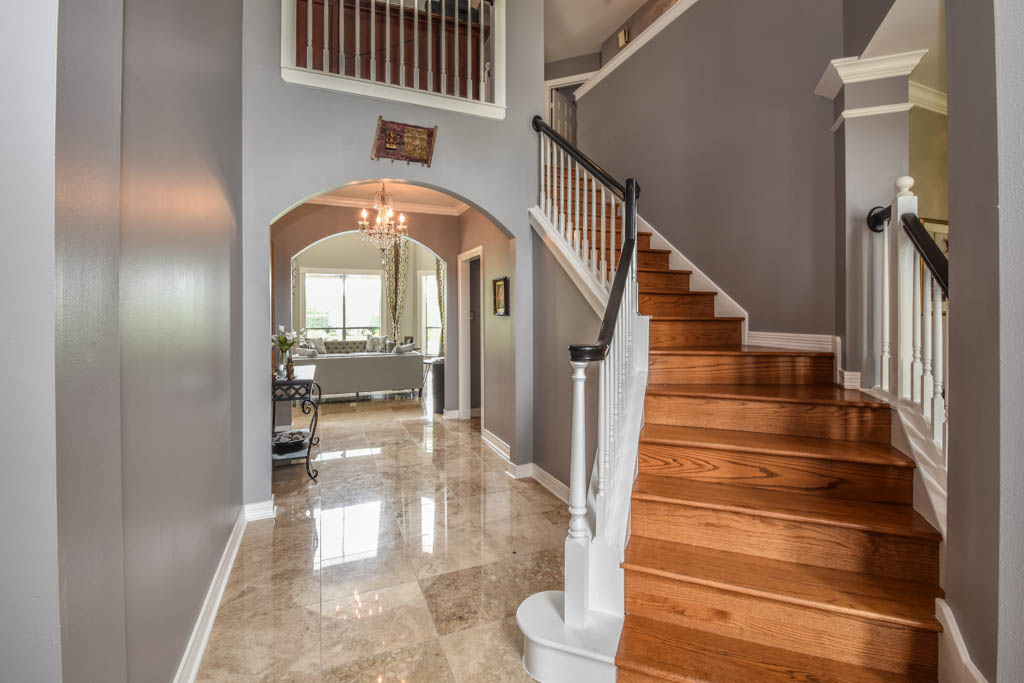
“Their style before was really non-existent,” says Lisha. “They did what most families do – got items when they needed them, worrying less about creating a unified style for the home.”
BEFORE SHOTS:
Other than a new travertine tile floor the client had put in 6 months earlier, the space had never been updated. The drapery had been there for 15 years. The wallpaper border and old window blinds had to go. And the living room had an enormous leather sectional couch that virtually filled the entire room.
In its place, we put all new, Mid-Century Modern furniture and from World Market. The drapery fabric and chandelier came from High Fashion Home:
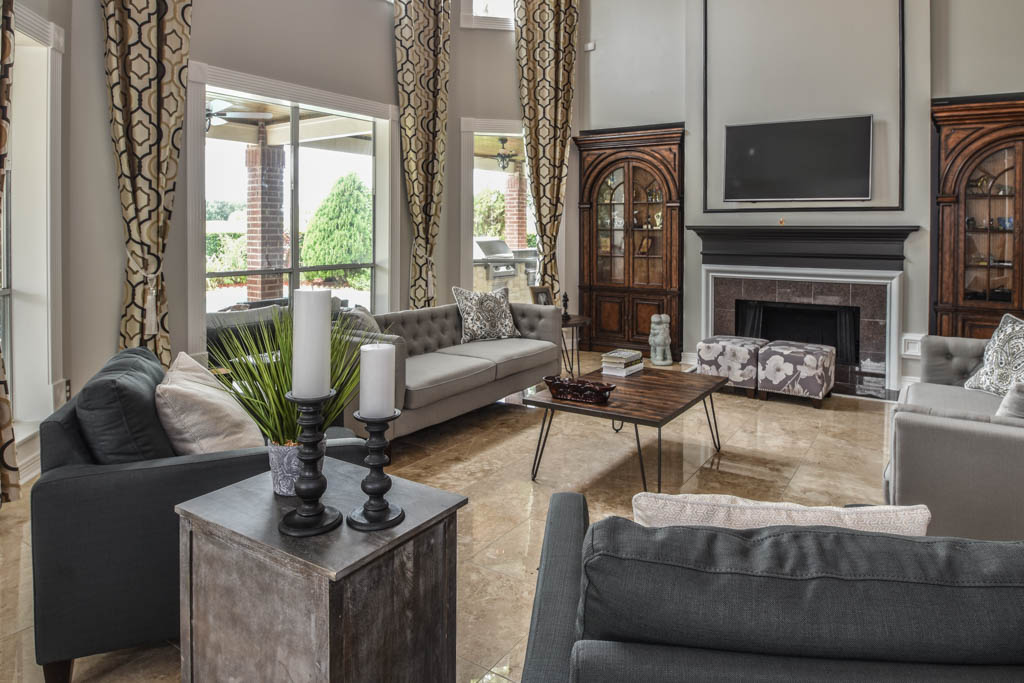
All the other new sconces and chandeliers throughout the house came from Pottery Barn and all the other décor accents from World Market.
Everyone got bedroom makeovers as well.
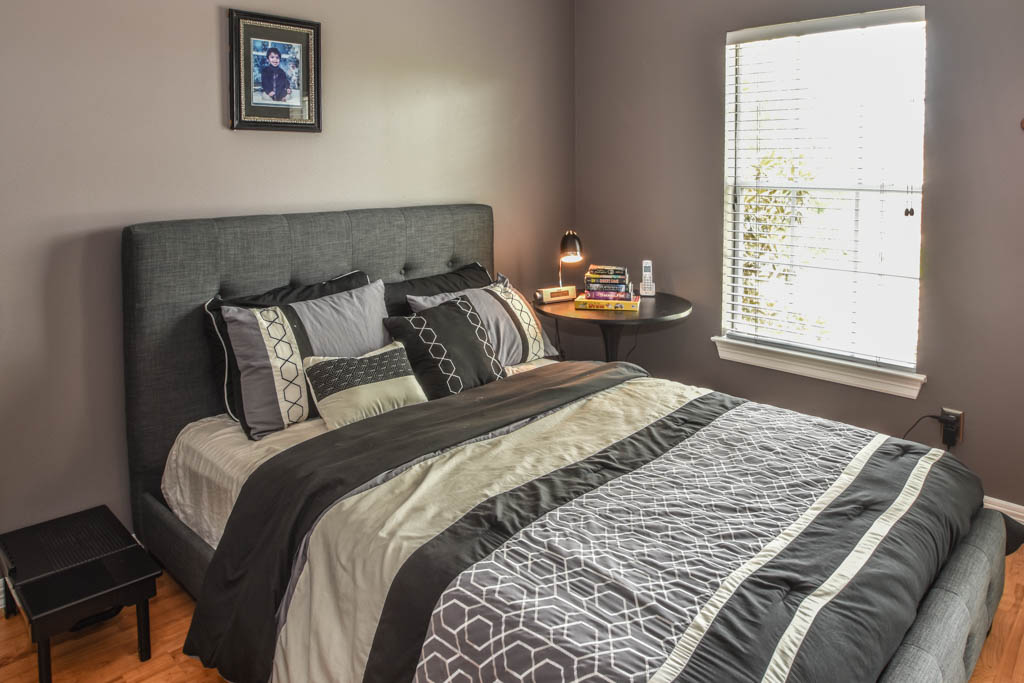
One of the sons, for instance, started with childish bunk beds and piles of books everywhere.
“We gave him a grown-up space he could enjoy well into his high school years,” says Lisha.
The new bed is from World Market:
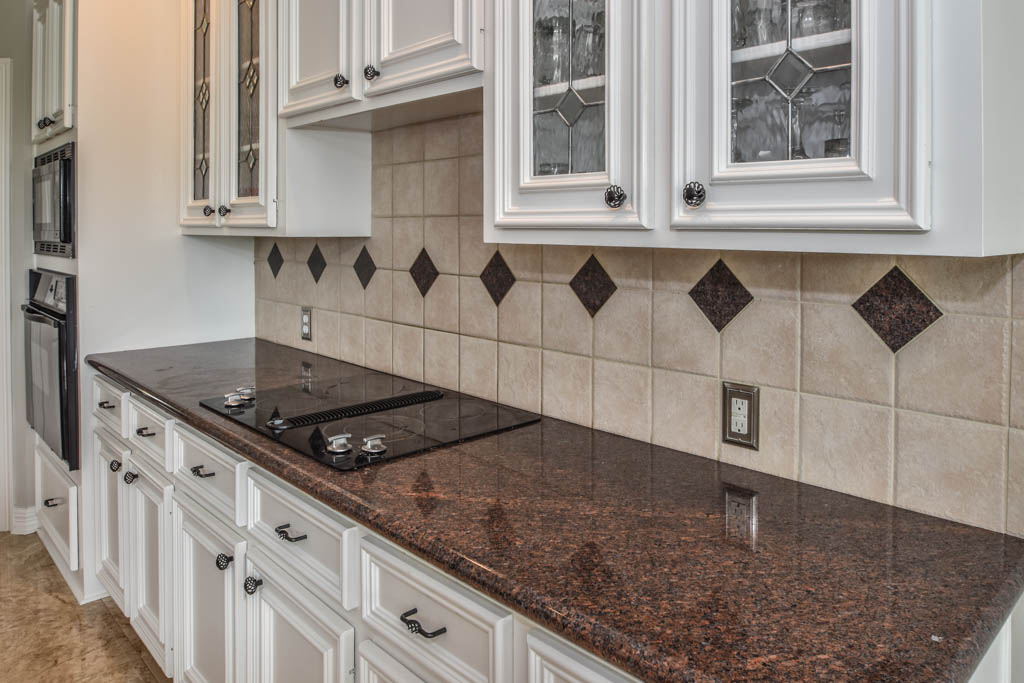
We also updated the kitchen by removing all the old wallpaper and window blinds and adding new paint and knobs and pulls for the cabinets. (The family plans to update the backsplash later.)
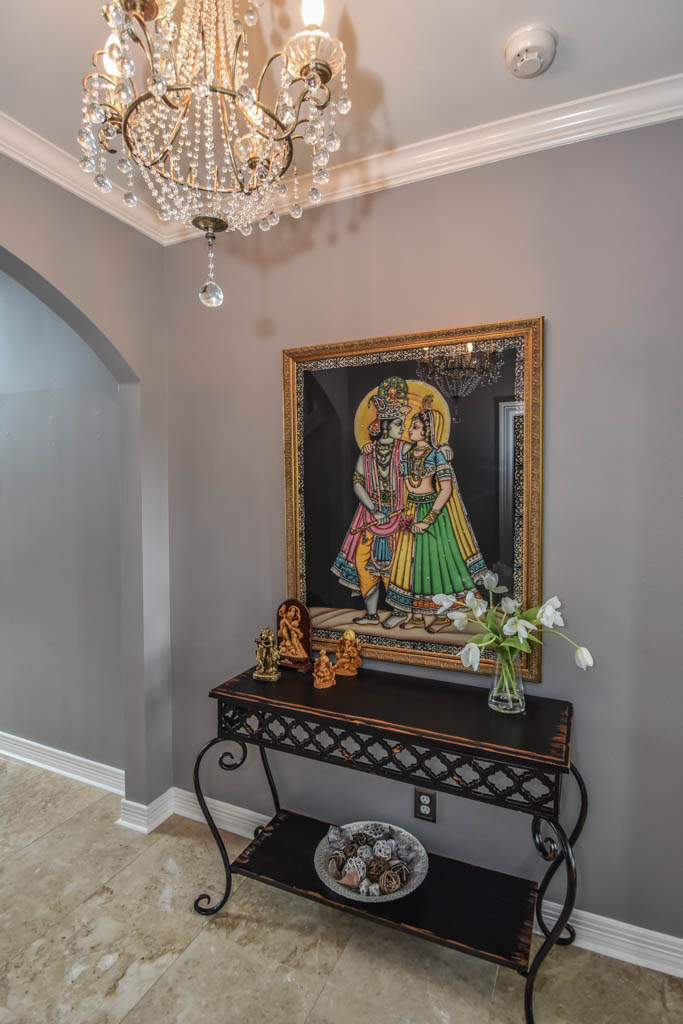
The top handrail on the stairs, meanwhile, got a coat of black paint, and we added a console table (from Kirkland’s) in the downstairs hallway:
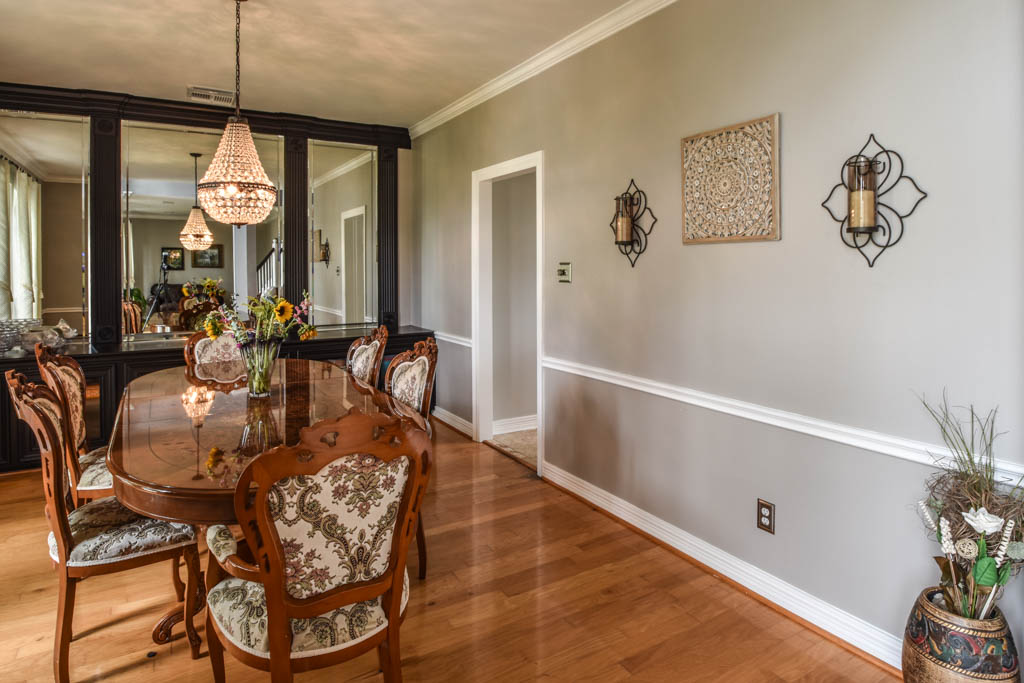
In the dining room, we painted the cabinet and mirror frames black and added new drapes, but kept the existing furniture and flooring
“I’m just so pleased with how it turned out – especially Lisha’s coordination of all the materials and finishes,” says Wayne. “But as a full-service outdoor design team, this is what we do, and our all our great reviews are telling us we’re doing it well.”
Houston Bathroom Remodel A Classic In Black And White
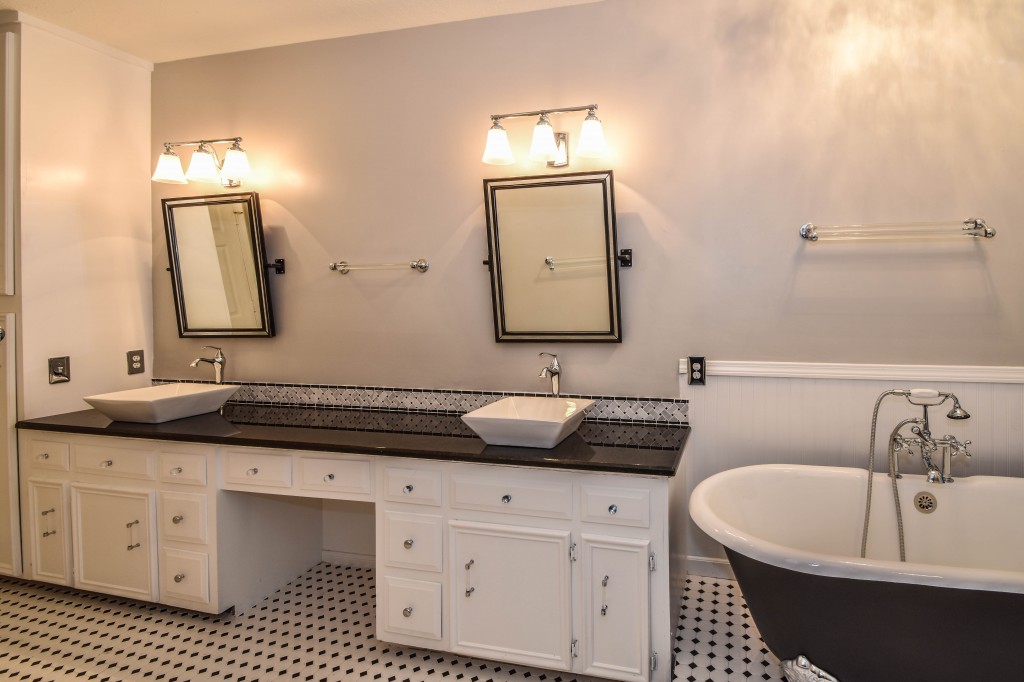
This Houston bathroom remodel is timeless, yet on-trend – with creative tile patterns, polished chrome and a black-and-white palette lending plenty of glamour and visual drama.
“We incorporated many of the latest bathroom design trends – like the metallic finish on the claw feet of the tub; crisp, bright whites and the oversized tiles on the shower wall,” says Outdoor Homescapes’ interior project designer, Lisha Maxey. “But the overall look is classic and elegant and will hold up well for years to come.”
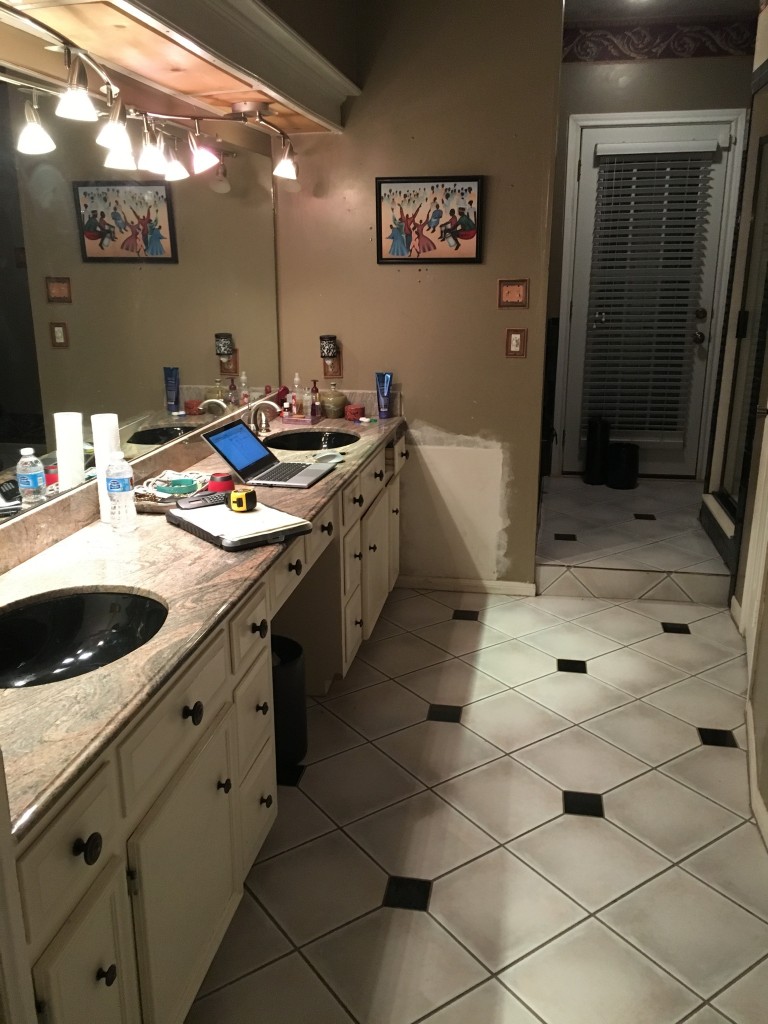
As you can see, this 300-square foot, long, narrow space has come a long way from its outdated, wallpaper-bordered beginnings:
“BEFORE” shots
“The client – a Houston woman who works as a physician’s assistant – had absolutely no idea what to do with her bathroom – she just knew she wanted it updated,” says Outdoor Homescapes of Houston owner Wayne Franks. “Lisha did a tremendous job helping this woman find her own personal style while keeping the project enjoyable and organized.”
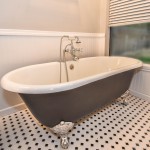
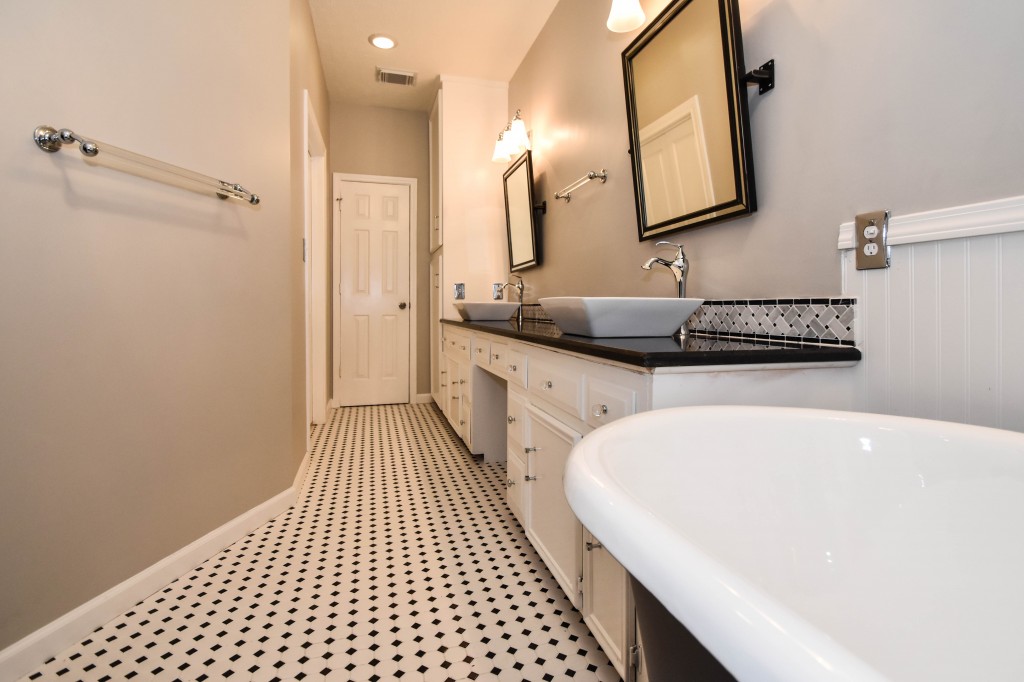
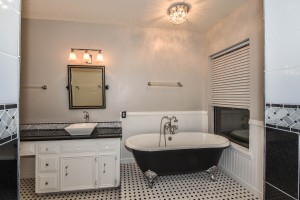
Let’s start the tour with the new, updated floors. Black-and-white Carrara marble mosaic tile has replaced the old 8-inch tiles. (All the tile, by the way, came from Floor & Décor. So did the granite countertop.)
The walls, meanwhile, have gone from ho-hum beige to Agreeable Gray by Sherwin Williams. (The trim is Reflective White, also by Sherwin Williams.)
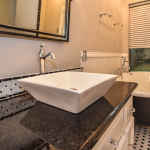
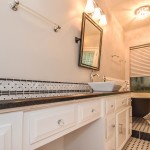
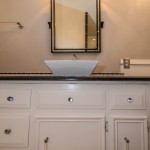
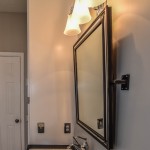
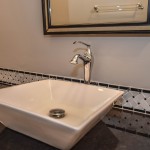
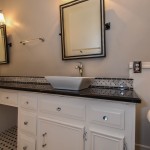
Polished “Absolute Black” granite now gleams where the pink-and-gray marble countertops used to be; white vessel bowls have replaced the black undermount black sinks and the cabinets got an update with glass-and-chrome knobs and pulls (note the matching towel bars):
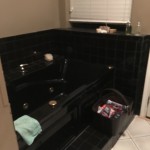
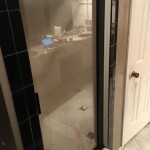
The outdated black tub also had to go. In its place we put a doorless shower.
Across from the shower sits a claw foot tub – a 66′ inch Sanford cast iron model in black, with polished chrome Imperial feet. “The waincoting behind it and chandelier above it,” notes Maxey, “adds an upscale, finished look and defines the tub area as a separate space.”
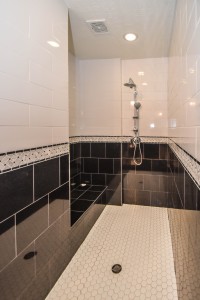
The shower wall features 6 x 18-inch tiles in a brick pattern – “White Ice” porcelain tile on top, “Absolute Black” granite on the bottom. A beautiful tile mosaic border – Bianco Carrara basketweave marble – serves as an accent ribbon between the two. Covering the shower floor – a classic white porcelain hexagon tile. Mounted above – a polished chrome European rainshower head.
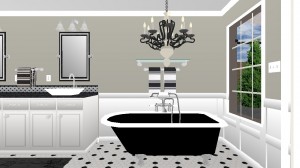
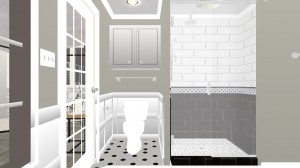
“As always, the client was able to look at – and make changes to – 3D renderings showing how the bathroom would look from every angle when done,” says Franks. “Having that kind of control over the details has been crucial to our client satisfaction,” says Franks. “And it’s definitely paid off for us, in all our great reviews on Houzz and in our Best of Houzz awards for customer service.”
3D renderings
And now on to final details!
Accents and décor from Restoration Hardware definitely put Maxey’s designer touch on the space – the iron-and-wood French chandelier, polished chrome vanity lights and swivel mirrors definitely knocked this bathroom remodel out of the park!
Here’s a gallery of more project shots:
Like what you see and want your own bathroom updated? All you have to do is contact us!
Houston Flood Damage? Now’s The Time To Rebuild and Remodel!

Houston flood damage? Anticipating an insurance settlement?
Don’t just rebuild – redesign – with Outdoor Homescapes of Houston’s renovation and reconstruction services!
Let our full service design team and construction crews help you make the most of this opportunity – with the style, function and customer service that earned us a Best of Houzz award for 2015 and 2016!
That’s right – in addition to our outdoor specialties like master planning and design, outdoor kitchens and covered patios, we’re also known for our exterior AND interior renovation services.
We can do everything from general carpentry and framing to correcting building defects and water damage. We can also replace or repair roofs, build additions, reconfigure space and update design.
Here are some before-and-after shots of some of our residential rebuilds and redesigns:
KITCHEN REMODEL:
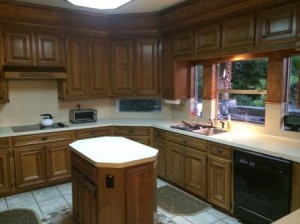
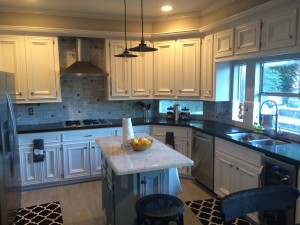
In this Houston kitchen remodel, we transformed this outdated, natural-oak kitchen of the 80s into a contemporary showpiece with industrial design influences.
BATHROOM UPDATE:

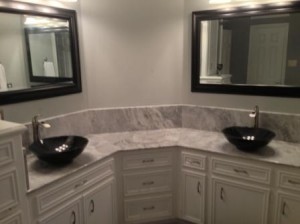

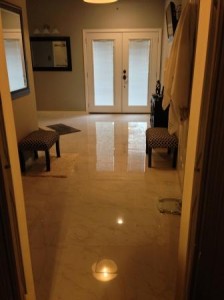
In this bathroom remodel in Houston, we turned a cramped, traditional bachelor bathroom into an en suite master bath suite fit for two!
ADDITION/EXTERIOR WORK:

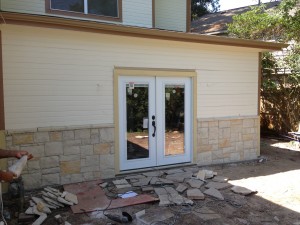
We’re particularly known for our space planning services – especially when it comes to a master design plan that plans for integrated changes down the road.
And, as illustrated below, our 3D design renderings and virtual video tours enable you to see – and make changes to – your renovation plans before they’re even started! No surprises – just perfection!
3D DESIGN RENDERINGS
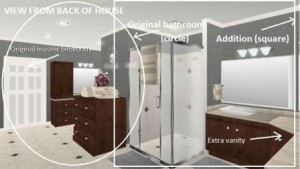

VIRTUAL VIDEO TOUR
As you can see, there’s nothing inside – or out – we can’t do when it comes to repairing, rebuilding and restoring your home.
Want to get started? Just contact us for a free estimate!
Or call us, at (713) 569-1341.
Houston Patio Addition Stylishly Meets Budget, HOA Rules
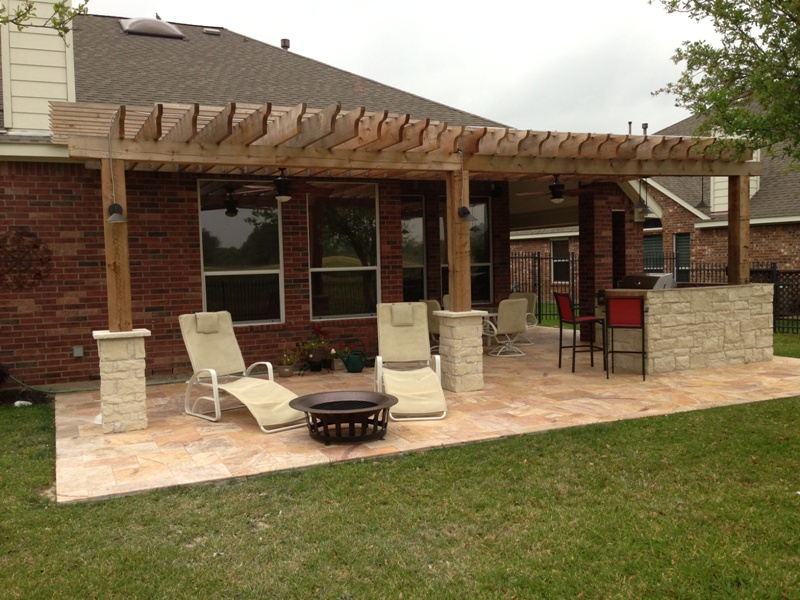
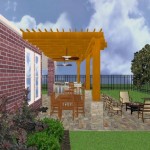
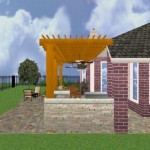
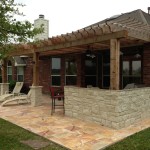
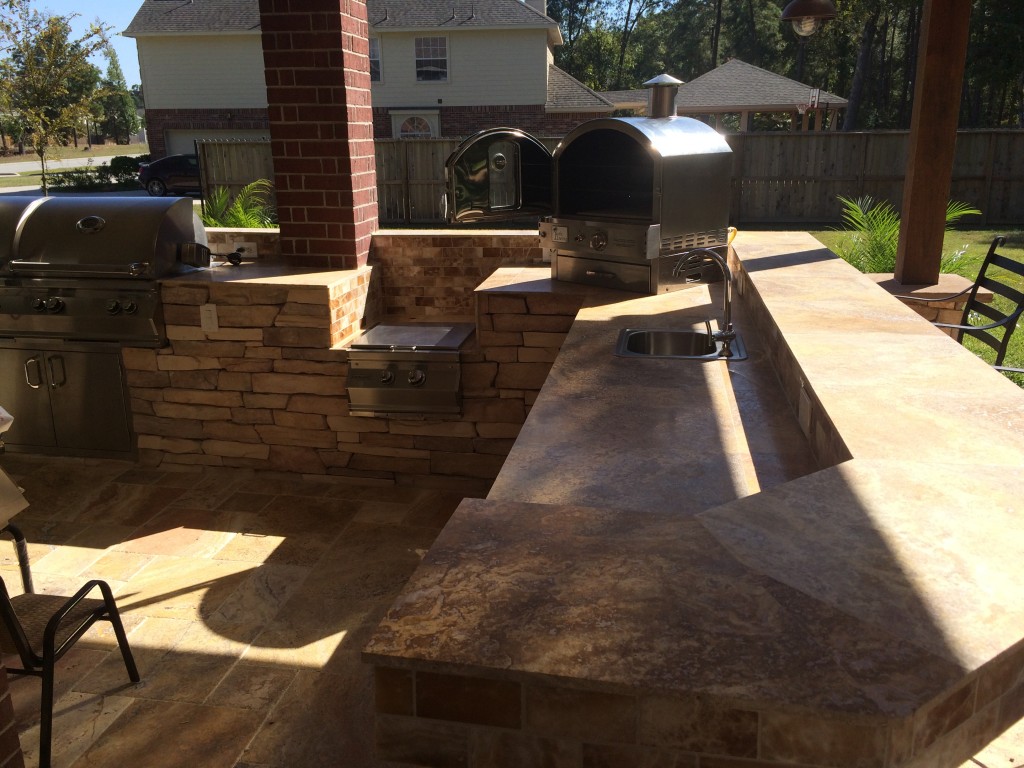
We love this rustic-modern Houston patio addition with an outdoor kitchen and double pergola!
It not only made the most of a long, narrow space while satisfying strict homeowners association rules, but did so affordably in a warm, timeless style.
Here are a few more shots of the finished project (click on any image to make it larger):
“The client really enjoys outdoor living, but had a specific budget they wanted to meet,” explains Outdoor Homescapes owner Wayne Franks. “They also live on a golf course and had to meet particular HOA requirements.”
The HOA requirements restricted how far back the new 450-square-foot patio and pergola could extend back into the yard. The HOA also wanted to make sure the patio’s colors and materials matched the existing home and others around it.
Here are some”before” pics, so you can see what we started with:
“We chose colors and materials that offered texture and character, but that would go with just about anything around it,” says Wayne. “We found that with the Fantastico travertine and the Austin limestone – two materials clients love and just can’t go wrong with.”
The Austin limestone facing the 8-foot-square, L-shaped kitchen island is dry-stacked in a castle pattern for a naturalistic, rustic look. Yet its light, neutral color keeps it fresh and modern.
Adding to the modern look are the stainless steel appliances: an RCS 30-inch stainless steel grill, double burner and outdoor fridge. Even though the finishes on the sink and light fixtures (Hunter pendant lamps and Hampton Bay light/fan combos) have a different finish – oil-rubbed-bronze – this actually follows the recent trend of mixing different metals, materials and finishes.
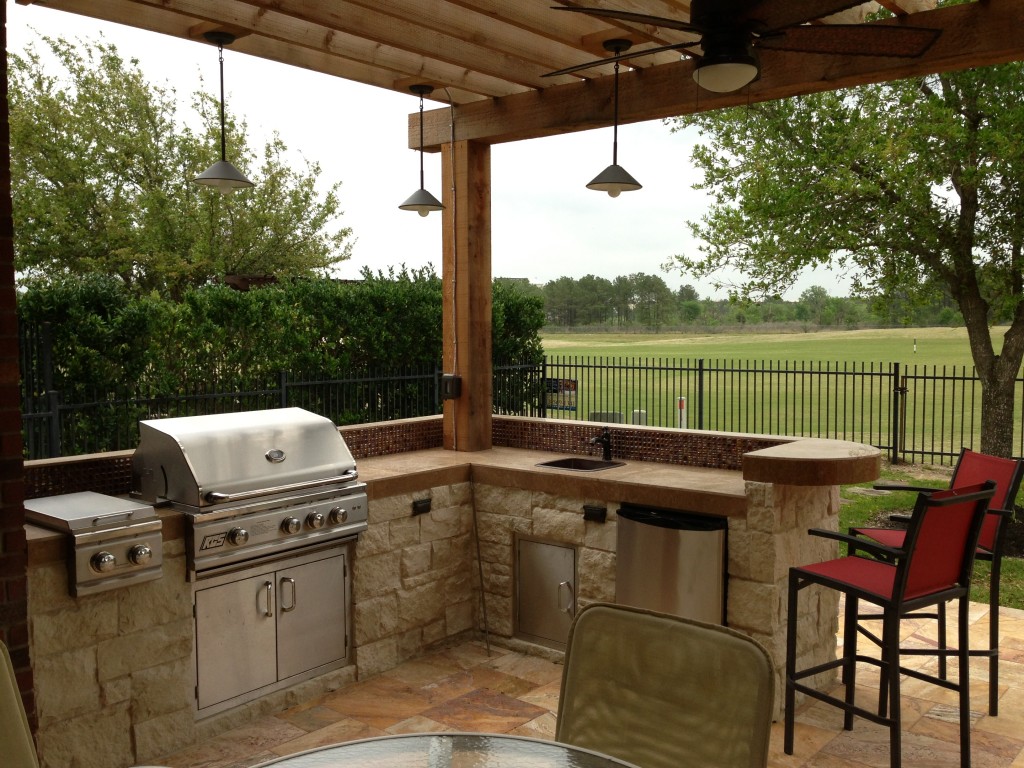
“The look’s not so matchy-matchy anymore,” explains Wayne. “Mixing it up makes it look more authentic and personalized.”
That’s why backsplashes like the one in this project – done in glass and metal tile mosaic – are also becoming more popular than traditional tile.
Another recent trend can be seen here, too – an amping up of color variation and texture.
“In addition to the split-face texture of the rock, you can definitely see the bold color variation in the travertine,” says Wayne.
The flooring is a Fantastico travertine, laid out in a Versailles pattern. “The Fantastico tile is killer,” says Wayne. “It goes great with red brick, which we have a lot of around here.” The countertop with the rounded, raised bar at the end is English walnut travertine.
Here’s another view of the outdoor kitchen:
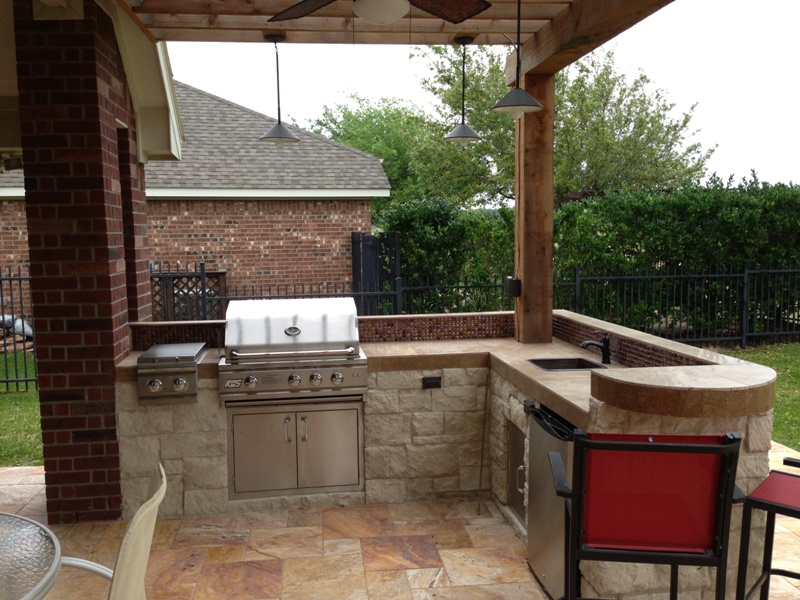
The red bar stools also add a pop of exciting color that contrasts nicely with the greenery around the patio.
The double pergola, continues Wayne, is No. 2 pine stained a Minwax honey-gold color. One side of the pergola – the side over the seating area – is covered with Lexan, a clear material that keeps out rain, heat and UV rays.
The pergola also juts further into the yard on that side. “It’s called a scallop, and it just lends some interest,” explains Wayne. “It prevents the pergola from just looking like one big rectangular hunk of wood.”
Wayne particularly likes how everything blended so well with the brick – which was a big concern – yet didn’t come off as too neutral or boring.
“The Fantastico travertine and red chairs do an excellent job of pulling the red from the brick and working with the warmth of that color to make a super inviting space,” says Wayne. “We’re really pleased with how it all ties together so well.”

Houston Patio Remodel Boosts Outdoor Party Potential
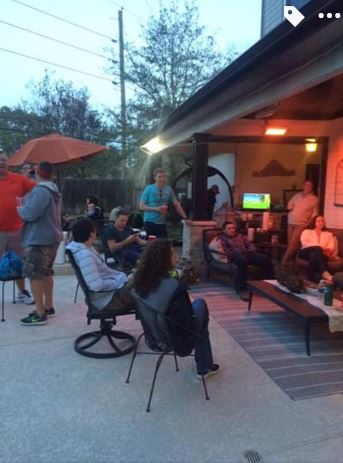
Our Houston patio remodel, we think, is just one example of why it’s important to update your outdoor living space if you entertain outside.
“It was our best party yet, especially after revamping our outdoor living space this past summer,” says company owner Wayne Franks. “Among our changes were a renovated pool, a permanently installed electric outdoor heating system, a new patio ceiling, lighting fixtures and furniture from Restoration Hardware and more upscale, stamped-concrete flooring.”
The patio furniture is from the Klismos collection, in weathered zinc, with Sunbrella fabric in the color “Smoke.” A sand-colored sisal area rug visually anchors the new conversation area.
Here are a few shots of the patio upgrades (click on any image to make it larger):
- Outdoor kitchen & TV area
“All the renovating really paid off when it came time to throw our annual Super Bowl party,” says Wayne’s fiancee (and Outdoor Homescapes’ main designer) Lisha Maxey. “Everyone had a comfortable spot to sit – and we had about 12 to 15 guests. Everyone also couldn’t stop remarking how much better everything looked. I really think that’s part of what made it our best Super Bowl party ever.”
Awesome food and fun activities also helped – from a cake bake-off pitting guys against gals to virtual golf to Wayne’s famous tenderloin done on the grill:
- Tenderloin on the grill
- Virtual golf
- Guys celebrate bake-off win
LED outdoor lighting – Wayne likes to call it “nightscaping” – helped the party linger into the night. A new outdoor audio-visual system and bigger flat-screen TV made the game easier for everyone to see and hear. And the permanently installed outdoor infrared heating system (by Solaira) helped to keep the nighttime chill off much better than the previous portable propane heaters.
What Wayne and Lisha did with their own back yard mirrors a local and national trend – updating and improving outdoor living space to make it more friendly for outdoor entertaining. In fact, according to a 2015 outdoor living survey by Houzz, 60 percent of homeowners surveyed were improving their outdoor living spaces for this very reason. And the top addition: patios, at 60 percent.
The investment is well worth it, according to the National Association of Realtors – especially in warm areas like Houston, where the return on investment is between 100 and 200 percent.
How can we amp up YOUR outdoor entertaining space? Fill out the contact form (at right) to learn more, get a quote or start working on the design of your dreams!
Pergola, Firepit, Outdoor Kitchen Heat Up Houston Patio
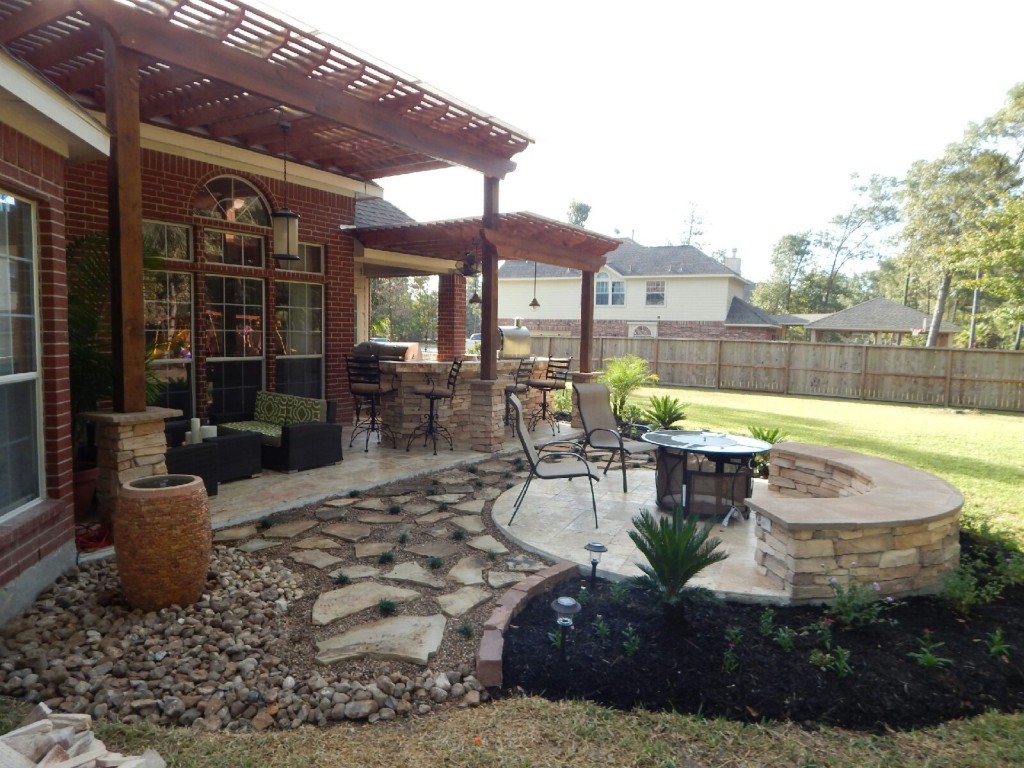
A two-level pergola, circular firepit area and outdoor kitchen with a charcoal-gas combo grill star in this Houston patio addition designed for entertaining large crowds in style!
“The client was an attorney with a passion for cooking and entertaining,” says the project’s principal designer, Lisha Maxey of LGH Designs. “Her main objective with this space was to create a large area for 10 to 2o guests, including seating and the prep and cooking of meals.”
Located in the backyard of the client’s home in Spring, TX, this beautiful outdoor living and entertaining space includes a 28-by12-foot patio with Fantastico silver travertine tile flooring, arranged in a Versailles pattern. The walkway is Oklahoma wister flagstone.
Providing filtered shade for the patio is a two-level pergola of treated pine stained honey gold. The larger, higher tier is about 18 by 10 feet; the smaller, lower tier is about 10 feet square. “We covered the entire pergola with Lexan – a high-quality, clear acrylic sheet that provides protection from the sun, heat and rain,” says Outdoor Homescapes of Houston owner Wayne Franks.
Beneath the lower tier of the pergola sits an L-shaped, 12-by-9-foot outdoor kitchen island faced with Carmel Country ledgestone. The island houses a Fire Magic® combination charcoal-gas grill and lowered power burner, a Pacific Living countertop pizza oven and a stainless steel RCS trash drawer and sink. The countertops and raised bar are Fantastico silver travertine (18-square-inch tiles) and the backsplash is real quartz.
“The most unique design item of this kitchen area is the hexagon/circular table we added to the end of the long bar,” says Lisha. This enabled the client to add seating for her dining guests.”
Under the higher, larger tier of the pergola is a seating area, made up of a coffee table and espresso-colored rattan sofa and club chairs with spring-green-and-white cushions.
“Lighting also plays an important role in this space, since the client often entertains in the evening,” says Wayne. Enter the chandelier over the patio seating arrangement and – over the outdoor kitchen – pendant lamps and an industrial-modern ceiling fan with a light fixture in the center. “It’s important to layer your lighting for ambiance, security and safety – from an all-over ambient light that fills the space to under-the-counter task lighting for food prep and cooking to path and retaining wall lighting.”
Off the patio is a transition area of crushed granite and floating flagstone pavers, leading to a circular firepit area of stamped concrete.
Here are a few more pics. Click on any image to enlarge:
At the center of this circle is the standalone firepit, framed at the back by a curved stone bench. The walls of the bench and column bases for the pergola, by the way, are the same ledgestone as the kitchen island. The top slab on the bench is a hearth piece of manmade stone.
“I think the finish materials blend with the home really well,” says Wayne. “We met her objectives of being able to entertain with 10 to 12 to 20 people at one time and being able to cook with charcoal and gas separately in one unit. And of course, the project was on time, on budget.”
“It is truly a paradise,” says the client in her Houzz review of the project. “They listened to my vision and incorporated their expertise to create an outdoor living space just perfect for me and my family!”

